Sunday 8 July 2012

A quick tip for sewing darts

After my five-day foray into the world of custom pattern drafting with the wonderful Dennic Lo, I have learnt so much that my brain feels like it will explode. In a tentative step to tell you about everything I discovered, I am starting with a baby step. Dennic showed us a really easy (and now I know it, obvious) way to sew perfect darts.

How do you normally sew darts? I am in the chalk camp. I mark the point with a white pencil (on the wrong side of the fabric) and the mid way points, and notch the raw edge where the dart ends. Then I draw the sewing line and pin carefully. This method works for sturdy fabrics (eg calico, medium weight cotton, denim). The drawback is that for slippery fabrics which distort easily, it is impossible to draw the line in the right place. The pressure of the chalk or pencil tends to pull the fabric out out of shape. So what to do?

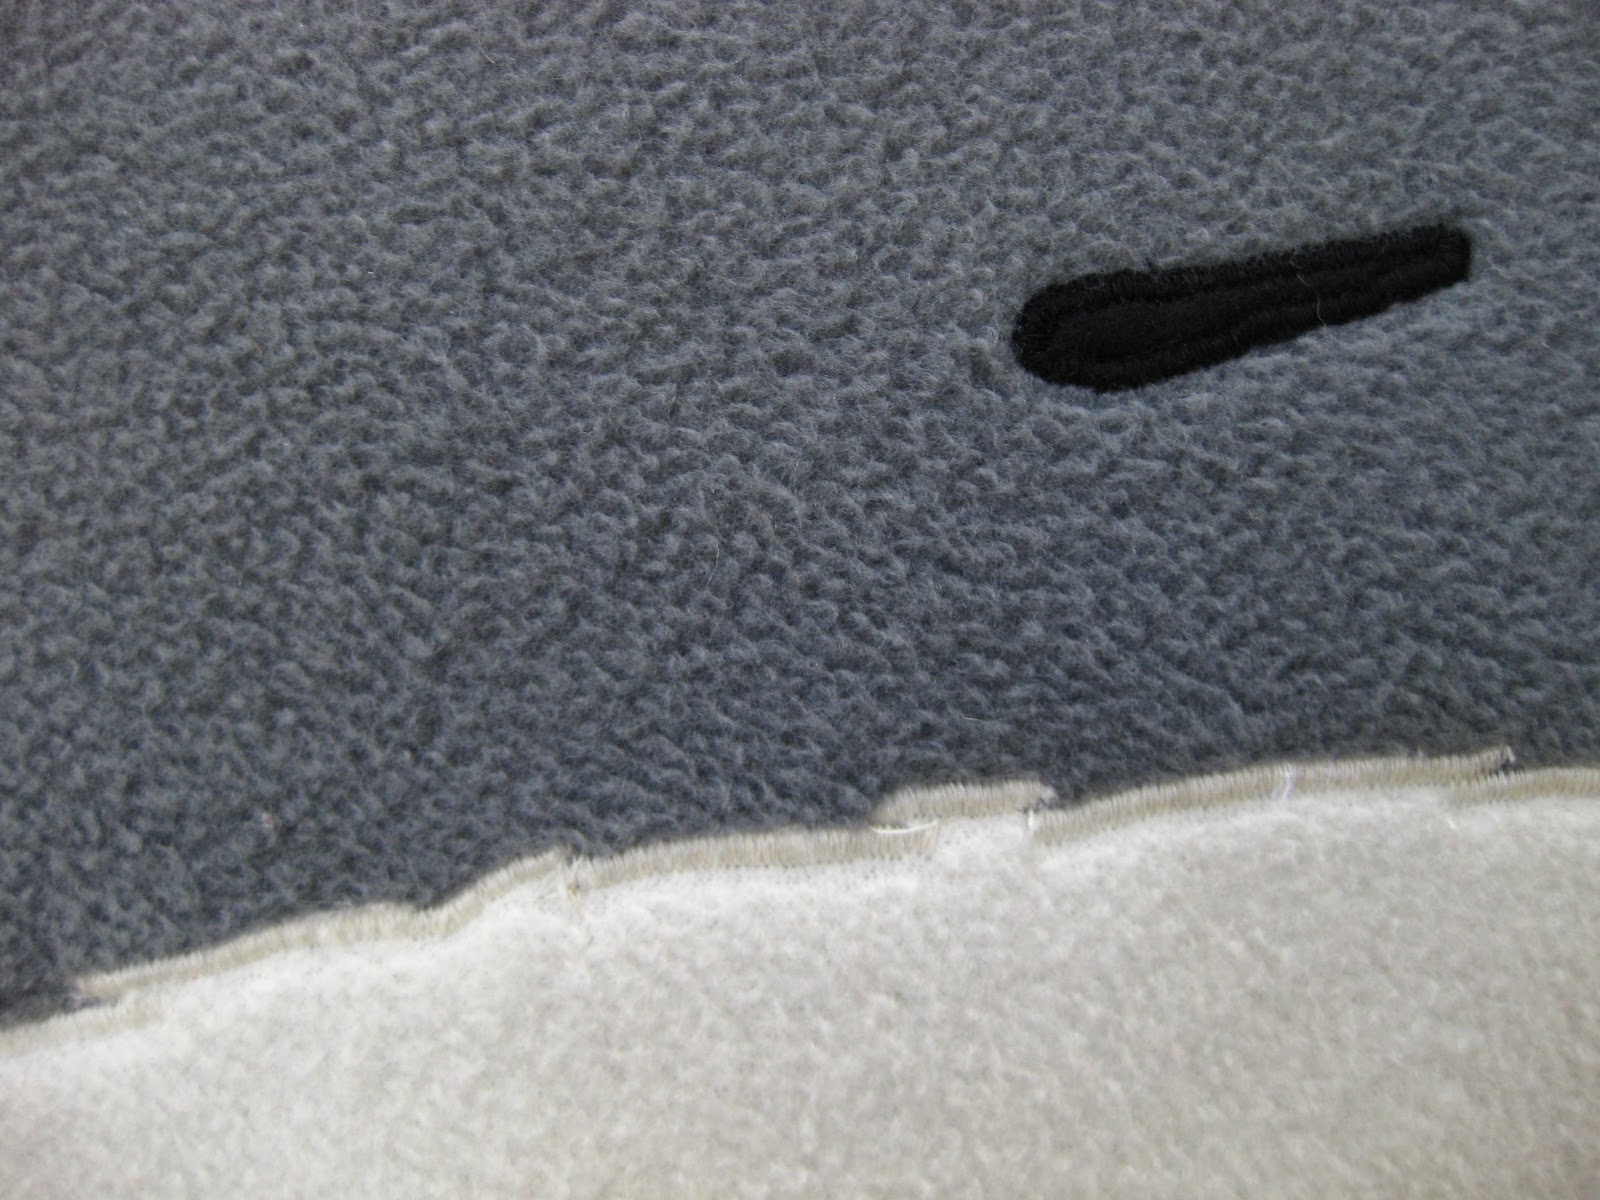
This is the clever bit. Firstly, you don't need a pencil. Dennic showed us a tool I had never seen before: a bradawl, or an awl for short. It looks like a small screwdriver and all it is is a rod of metal that tapers into a fairly fat point--

A bradawl
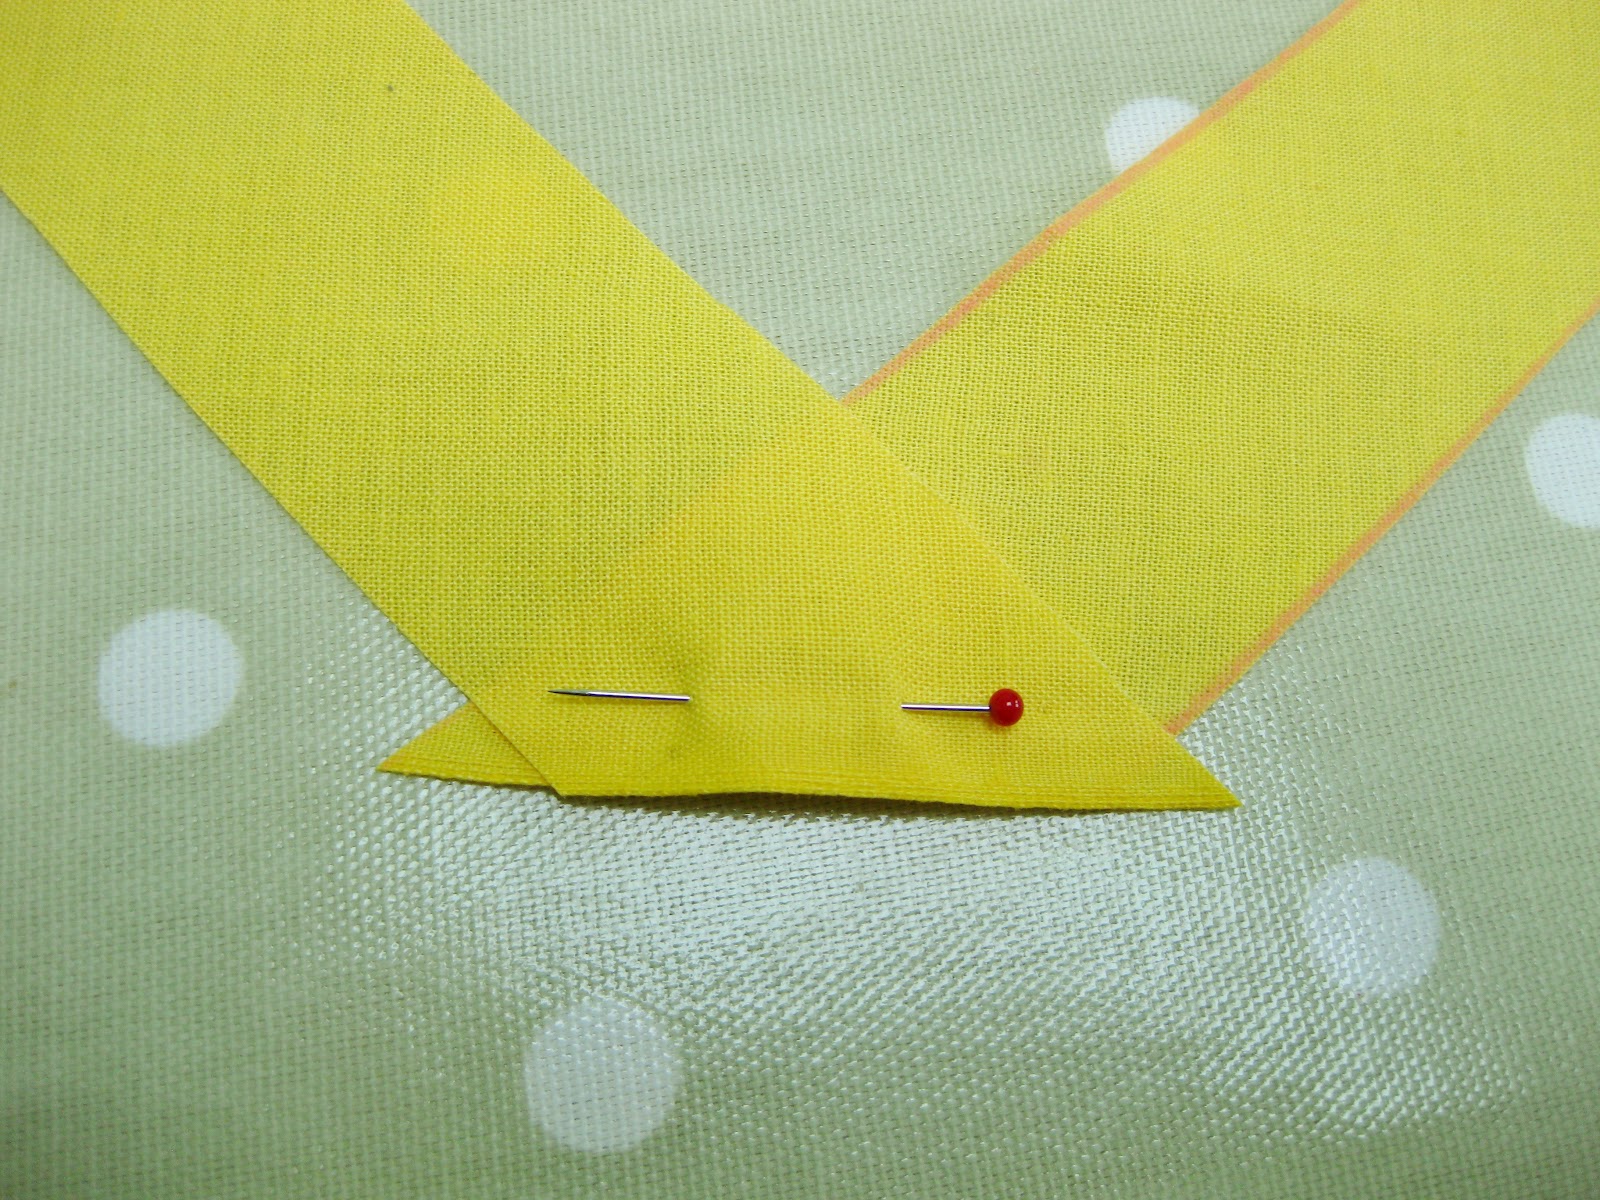
This point is designed so that when you push it into fabric it pushes the weave open to create a hole. If you just press the hole with your fingers it'll close up. Notch the dart position at the raw edges. Then use a strip of card with a straight edge (cut one side wavy to ensure you only ever use the straight side). Fold your dart and match the notches. Line up the fold to the point, put it under the foot of your machine and bring the needle down so it doesn't move. Lift the foot of your machine, whip the piece of card towards the unfolded side of the dart. Check the notches are still matching, put your foot down and sew! Try not to sew through the card as this will blunt the needle faster.

You have a perfect dart without the trouble of pins and fiddly chalk lines!

Alix xxx

Sunday 1 July 2012

LCF: Customised pattern cutting & fitting 1

© 2012 University of the Arts London
Tomorrow is the start of a very exciting week for me. This week I have signed up to one of the London College of Fashion's short summer courses. I've got my materials from the list sent to me (although I think that for the rather hefty sum paid they could at least include 2H pencils on the house!) and I'm ready to take on customised pattern cutting! Whoop! I shall report back on what I learn, and what I draft. 

The details on LCF's website state that you can make a dress, skirt, shirt or trouser block. Now I think a skirt block is so simple it's hardly worth the money. And I have a dress block. So... do I go for a trouser or a shirt block? My thrifty side is shouting 'shirt' very loudly, as this seems like the best value for money. But my practical side is saying that I'll get more use out of a trouser block. Unless shirt blocks are adapted to make jackets? Then that is value for money. I shall ask tomorrow, but I think I'm leaning towards trousers. 

I am also hoping to get some good info on adapting my block to different styles. I want to leave with a pattern for some mid-rise cigarette trousers, such as these--

ASOS Belted Peg Trouser with Turn Up
And I have just seen that our teacher, Dennic Chunman Lo is a freelance pattern cutter for Asos - maybe he designed these! 

Tomorrow it will be hard to contain my excitement and nerves as I am placed in a room of fellow sewing-crazy people (I guess it's a bit like the first day of school). Surrounded on all sides by my own kind! I will endeavour of course to remain demure and studious although I am worried I will be starstruck when I meet Dennic and will call him something ridiculous like 'your highness' and then blush and all my classmates will label me the weird one.

Before this gets out of hand, that's all for now folks!

Alix xxx

Graduation dress

After a short-lived celebration of the fact that I might never have to sit an exam again, I am returning in October for another round of the dreaded finals, this time in another subject. Gutted that I wouldn't get to graduate along with the rest of my friends, I was still able to get in on the action by going to the bf's graduation. And so I needed a dress. 

One of the most satisfying things about sewing is when you see that long cherished stash finally rise to glory in a project. Last summer I bought this wonderful fabric at Liberty in London:


I had thought I could make some lovely summer pyjamas, but why waste such good fabric on something noone ever sees, apart from me! It had to be a pretty summer dress. There's a little independent clothes shop in Cambridge called Lilac Rose which I cycle past nearly every day which often has girly summer dresses made up in floral and geometric patterns: after months of looking in the window the desire for a floral dress has piqued me! And of course, I had to put a peplum on it--

By his own admission, the bf is, at best, a mediocre photographer.
Here I am almost about to laugh, hence the strangely tight smile!
The neckline is inspired by Casey's tutorial for a 50's sundress which I look at weekly because it is so cute - I can't get enough of it!

The wind is lifting the peplum and showing it off nicely!
I wanted a full peplum so I made it out of a circle of fabric, but in two halves so there was a break in the front for the button plaquet. There is a centre back zip and the bodice is underlined with white cotton.


I trimmed the seam allowance to the zip tape and then catch stitched the seam allowance and tape to the underlining.

The button and fake plaquet were made with a long strip of interfaced white cotton (same fabric as the underlining). I turned under a 1/4" seam allowance on each edge, stitched, then stitched the lace on top. Then I sewed on top of this stitching line to attach it to the dress. I put the buttons on once I had put the bias tape on. 19 buttons is a lot of buttons to hand sew!


The Liberty tana lawns are really light, and even with this busy pattern, the fabric was a little transparent, hence why I chose to underline the bodice. I didn't bother for the skirt because the peplum created a double layer of fabric around the critical must-not-be-transparent area (i.e. one's kecks). Because the fabric is so light, it was very easy to hem--

♥ my new overlocker
I just overlocked the edge and turned it under. This was particularly handy for the peplum hem. I find that getting a smooth, unrippled hem on curved pieces, especially on smallish circle pieces, is difficult. All that mixing of grainlines (sometimes you're sewing on the bias, sometimes dead straight along the weft and warp threads) can make it tricky to ease the turned allowance into the curve.

Hopefully I can make use of my new summer dress on my trip to France, assuming that the weather isn't as changeable as it is in Cambridge!

Alix xxx

Saturday 30 June 2012

Vogue 7365 (or, the other ball dress)


Last year, I indulged my love of velvet when I made V7365. It took me a long time to get hold of good panne velvet, which I had to order online in the end. Here is the version I chose:


Now, I had my doubts when I saw the satin version on Vogue's website:


Aside from the tacky oh-so-shiny pink satin, the dress looks really ill-fitting around the stomach and hips and the shape of the halter is not very flattering. Everything about this look is, let's face it, bad. However, I loved the back of the version I chose enough to go for it: I crossed my fingers that velvet would work better with the design. Luckily, the gamble paid off! I wore this dress last year for a white tie ball (I've never felt so dangerous and sassy as wearing three-quarter length black gloves: I felt like I was the killer in an episode of Poirot!) and this year for a black tie ball, sans gloves and fur stole.

I hemmed the dress for wearing with high heels when I made it but this year I wore flats. I can't bring myself to chop off a couple of inches in case I want to wear it with heels again. When I made up a muslin, that baggy stomach area I noted in the picture on Vogue's website was indeed present. I came up with a simple solution, but I ummed and ahhed about it for ages because I thought that I was committing a cardinal pattern sin. Technically, a bias cut dress, which this is, shouldn't need darts, but a 7" dart from under the bust to an inch above my hip bones seemed to sort the problem out. I was worried that it would affect the drape, but when I made it up in the velvet there was no such problem. Also, the pile of the velvet hides the sewing lines of the darts, but I think they would be too noticeable if I had made this dress in satin. The great thing about panne velvet, which has a slight stretch to it, is that it hugs in the right places. Look at another photo from Vogue's website:


Look at the strange warping of the fabric around that side back area and the way the v of the dress back stands away from the indent of the model's back. It is beyond me why Vogue recommend crepe backed satin when the photo seems to suggest that a stretchless fabric does not quite work with the design of the pattern. My muslin (also a stretchless fabric) gaped at the side and I was worried there might be a lotta boob on view. However, salesman-and-representative-of-all-things-velvet that I am, the slight stretch of the velvet seemed to eliminate the gaping.


In the photo above you can see a little bit of gapey-ness. You can also see evidence of some seriously lazy pressing. There shouldn't be ripples down the centre front of the skirt! You'd think Vogue would do their utmost to show you a picture of something perfect to make sure you want to buy it...


I've never been that aware of the difference in the length of my legs but in this picture it is quite obvious that my right leg is longer. Maybe I should start altering my patterns to accommodate this? I will also tack the halter and underarm straps where they meet so they don't drift to the side, as they have done here.

The dress is lined with silk habutai. I thought that the velvet was quite bulky so the suggested charmeuse lining would be too thick.

I made a little matching bag (or 'ball sack' as my bf has named it - not exactly the height of wit) out of left over velvet and a sheet of flexible plastic that was packaging for some coloured paper I had bought. Thrifty! I put some decorative trim lengthways down the bag and some scalloped lace around the top. Seeing as velvet is self-finishing (i.e. it doesn't fray) all I had to do was cut some small vertical slits around the neck of the bag and thread some ribbon through. And I cheated and used the selvedge as the neck of my bag so I didn't have to turn it over (and handily the selvedge is strong, so it won't distort if there are any heavy things in the bag. Genius! And finally, here is a close-up of the hair, which is actually very easy. Here's how with the lovely Lilith.


So what have I learned from this project? 
1. Just because something is a sewing crime in principle (i.e. darts on bias fitted piece) it doesn't mean it won't work! 
2. Always look beyond the pictures in the pattern catalogue. 
3. Use those pictures as evidence of fit problems before you start, although if the garment is being modelled it has usually been tested. If you don't see the garment made up in the catalogue, it has probably not been tested. 
4. Velvet is great (but I already knew that). 


 Alix xxx

Wednesday 20 June 2012

The ball dress, part 2

And now for the big reveal! The pink ball dress was finally finished at 4pm on Monday - the ball started at 8pm. I am always manage to finish things just before the deadline; I have a feeling that when sewing, I stretch out the project to last right up until when I have decided it needs to be finished by (or in this case, when the ball decides it must be finished!). I want to say that I do this because I love the process of making something, but I think it might have become a hangover from being a student: sewing projects have become infected by the dreaded procrastination! Any way, here's me procrastinating about showing you the dress! Here it is--


As you can see from the photos, the dress has one long side slit, a hand-picked zip, a cowl back and a belt embellished with matching cording and a couple of home-made beaded tassels. Those tassels! My, did they take a while. I also made a slip to go underneath for that bit of extra warmth and on the advice of my housemate, who ran to the defence of slips when I accused them (too rashly) of being mumsie, "They smooth everything out!"
I chose to make a dress for three reasons: 1. no-one else would have it; 2. it would fit better than something I bought; 3. it would be far cheaper than buying a dress. 1. is an indisputable fact. 2. is a matter of opinion and 3. needs to be proven. So here is a quick costing:

Fabric
Sand washed silk............£10/m.   2m = £20
Silk organza...................£9/m.  0.5m = £4.50
Charmeuse....................£7/m.  0.5m = £3.50

Components
Zip......................................................£2.50
Hook and eye......................................Stash (for argument's sake, let's say 5p)
Knitted fusible interfacing.....£5/m. 0.2 = £1
Thin cording..........................................£3
Fat cording...........................................Stash (again, let's say £2
Silk thread............................................£3
Beads..................................................£4.50
Elastic..................................................£1


Total                                                 = £44.05

£44.05 is admittedly not cheap. However, because I was using such a fine fabric I decided that I should go the whole hog and try to use couture and hand sewing techniques where appropriate. So what I got was something I couldn't buy from a shop, something with the little extras hidden to all but me. Normally I would turn to my overlocker or the trusty zig-zag stitch on my machine, but I didn't want the overlocker stitches showing through after pressing (only silk thread irons without leaving an imprint on the fabric). I did french seams on the bodice sides, shoulders and the left side of the skirt. I have to admit to being a bit confused when I first tried the french seams, but after a couple of practices I realised they're quite simple. I used the tutorial over at Coletterie to make my french seams.

The front bodice is underlined to the waist with silk organza. Partial underlining on one piece, from my experiments, works! 


I used some knitted interfacing (it drapes better than woven interfacing) on the back in a strip under the cowl to give it some support--


Apologies for the poor line drawings! 

The belt was an addition to the original plan because the front looked a little plain and the bias-cut cowl back seemed to droop a little at the waist. Looking at the dress now, the belt, I think, is one of the nicest features. I used Coletterie's tutorial for making covered cording, which I used to make the swirly bow motif and also to tie the belt.

I have learnt so many new things from this dress. I've learnt how to draft a cowl back. I've learnt how to use underlining. I tried a new method for finishing necks and armholes--


Using bias tape folded together, you can turn your seam and encase the raw edges, so no stitching shows on the outside of your garment. Above you can see my slipstitching through the organza. I saw this technique over at Amanda's Adventure's in Sewing

I learnt how to make covered cording. I learnt how to peyote stitch beads. I did my first hand picked zip strengthened with silk organza (which is in many respects easier than using a machine as there is less trouble in lining up each side of the tape). 


I'll stop here because I could go on forever about this dress. There are so many bits to explain!


Alix xxx

Thursday 14 June 2012

The ball dress

The emergency stand-in ball dress is coming along nicely. Today, after drafting a skirt block and using LiEr's (from ikatbag) advice to place the front waist darts under the bust point, it suddenly occurred to me that the front could be all one piece. How did I not see this before?! It saves on precious fabric and will make the line of the dress neat and clean.

I used gedwoods' tutorial over at Burdastyle to create my skirt block and extended it to floor length. The front waist darts on this block seem to be very far away from the centre. I made a muslin and these darts make a flattering line, but they had to line up with those on the bodice. This was when I had my light bulb moment. I tried to look for instructions to make a dress block but couldn't find anything so instead I looked at Google images. I think extending straight down the lines of the bust point to make the whole dart should be fine in terms of shape, but I am a bit worried. If you look at this sloper you can see that the dart is asymmetrical: it is deeper towards the side seam. I'm not sure if this a personal choice thing or if it is to do with the particular proportions of the body this sloper is for. I tried to hunt out my New Look 6049 pattern (a dress with one front piece with two long waist darts) to check if the darts were placed in parallel lines  to each other but I couldn't find it in my pattern stash. From looking at the photos of this dress from my earlier post, if the darts flare outwards anywhere, its from the waist to bust. I had already altered my bodice block because I thought the darts leaned inward too much towards the waist - basically, this shape didn't flatter me, nor did it look right. Thus I am steaming ahead with my straight up and down drafted darts. I have made the darts on the skirt wider to meet those of the bodice (the skirt ones were only 2cm wide) and then extended the hip edge outwards and blended it with the bodice side. 

I intend to underline the front bodice piece, although with my new idea of a single front piece, I'm not sure how partial underlining works (if it works at all). I am going to use silk organza, which is quite stiff, so I don't want to take it down into the skirt as I think it will make it look too rigid. I am underlining because I reckon that the deep cowl back coupled with the narrow shoulder straps will pull the front bodice. To make sure I get my nice drape on the cowl I need to ensure that there is a solid frame for it to hang from. I think I might partly line the skirt, say to just above knee length, just to get some extra warmth. If one thing is certain, these wonderful May balls get cold at night. Really cold, in fact! 

Some great tips on underlining for y'all, just in case you get the urge to underline something:
I have two other tricks up my sleeve that I want to try on this dress. Gertie also does an interesting post on stabilising necklines by using short organza strips - I think this method may make an appearance on my dress. I also might insert a waist stay just to make sure that everything sits exactly were it should.

I'll post some photos of the dress as it comes together!

Alix xxx

Wednesday 13 June 2012

End of Exams (a.k.a more sewing projects than you can shake a stick at)

Hello readers! Long time no see. A week and a half ago I finished the dreaded Cambridge finals and now I am blissfully contemplating the fact that I might never sit another exam ever again. Ever again?! Wooohoooo!

Since then I've been feeling a little bereft and lacking in purpose so I returned to my faithful friend Silver and his new buddy, a Janome 744D - a shiny and wonderful overlocker (or serger, as those of you on the other side of the pond call them). I've been getting on with duffle bags and ball dresses and have been turning my hand to some pattern drafting. In July I'm going on a five day pattern drafting course at the London College of Fashion and I am so excited! 

So after Vogue 2929--


-- let me down... {in a big way: The bust line just gapes open, as though they had designed this dress with a G-cup wearer in mind (not necessarily a bad thing seeing as so many women have to do full bust adjustments, but generally uncharacteristic of Vogue patterns). It has a corset and bra cups in the foundation layer but even wearing a strapless bra and chicken fillets with it is still not enough to make the damn thing fit. I intend to try a waist-stay to see if it helps the dress at least sit where it ought to but I don't have high hopes}... I've decided to draft my own dress inspired by Audrey Hepburn and the oh-so-sophisticated-lovely-drapiness of the cowl back. I am working with a rose pink sand washed silk, so I had to do something to show off its wonderful drape. The silk is so crisp: it makes the most amazing sound, almost like paper, when you waft it out of its folds. Here is my inspiration for the shape:


The front will be a high, close fitting slash neck with thin straps, like Ms Hepburn's dresses above and the back, a deep cowl, so I'm mixing austere and daring, classic and modern, grainline and bias. There are quite a number of sites out there with info on how to draft cowl necks, here's a list:


I worked from the basic bodice block I made using gedwoods tutorial at Burdastyle. I used PoldaPop's tutorial for the dart rotation in order to eliminate the two darts in the back (unnecessary for a bias garment and also ruinous to the cowl) and rotate them to the neckline. Then I used the method listed over at Pattern Making and Dressmaking NZ to make a deep cowl by fanning out my basic bodice block - six slashes opened about an inch. I still had trouble making a really deep cowl back. I have so far done three muslins and I am finally reaching a cowl depth that satisfies me. 

I am also wondering what to do about the skirt. I am working with a little over 2m of a not very wide fabric so it has to be a straight skirt really. But how to ensure it doesn't look shapeless and boring? And that it does not make me look like a rectangle (my body shape, aka 'apple shape'/ waist not so trim)? I have thought about doing it on the bias but I'm not confident enough to fit a bias-cut skirt. And it's all been complicated by the fact that the cowl back is going to bias-cut but the front will be cut with the grainline (perhaps it is a sign from someone up there not to mix my grainlines...?). I have also thought about simply making the skirt a tube just wider than the widest point of my hips and making inverted pleats or gathers at the waist. Darts on the skirt would look weird with a waist seam; why not make the top and bottom one continuous piece? but of course, we know the answer... the bias bodice back. The mind boggles! Either way, I know it will have a side closure (can't have a zip going through the middle of the cowl now, can we?!) so it will have a side, or maybe two, side slits, which is erring a little to close to the nineties for me, but hey-ho.

I have also started a new knitting project featured in Kim Hargreaves' new collection, Whisper. I'm making my first jumper, Smoulder, in a pale grey wool. I also have my eye on Sophia, Christina and Ebony (that sounds wrong - why give knitting patterns ladies' names?!).

Alix x

Wednesday 11 April 2012

Giant Totoro cushion

This Christmas I had a last minute panic about a present for my boyfriend. I had lots of little bits but nothing that tied it all together: in essence, I had no main present. On Christmas Eve an idea suddenly came to me. I rushed out to the fabric shop to get everything and zoomed home to start making it.


Here he is--


As you can see he's made from cream and grey fleece with a red twill background. He has a grey denim backing and opens at the bottom with a chunky red zip.


We both recently became obsessed with Totoro because he's just so damned cute! Here is the reason I made the Totoro cushion: I thought I'd make a friend for a teddy we each have, who looks like this:


The teddy is like me - small and yappy, always got it's mouth open - and the cushion is like the bf - big and less talkative, more sedate. 


Here are some close-up details of the cushion, which, by the way, really is massive. It's 90cm x 90cm. Why so big? Because I love giving obnoxious presents, is the simple answer! Last summer I brought back from Mexico the biggest sombrero I could find, much to the despair of my travelling companion. It was so big it couldn't fit in my bag so I had to carry it as hand luggage. A man in the queue at immigration even felt the need to say, 'I don't think that hat is big enough.' Ha! I actually quite agreed with him, although he was being sarcastic.


Totoro was surprisingly easy to make. All the zigzag stitching on the appliqué was quite time-consuming, particularly on the fluffy wisps I cut into his belly fur. But it was all still very straightforward considering I didn't use any interfacing. On that point, I decided not to use the old stitch-n'-tear because of the vast size of the appliqué; I didn't want Totoro to feel crispy. He has a profile the size of a person so I wanted him to be soft so you can comfortably sink into him, like the Cup-a-Soup hug-in-a-mug creature. I think using fleece and a backing of twill eliminated the potential for warping and flimsiness you can get when you appliqué ordinary cotton. The eyes, nose and mouth are made from felt which also eliminated the need for stabilising. 


I love him. I wish I could be bothered to make myself one. I also wish I had the room to own one!


Alix xxx

Tuesday 3 April 2012

Drafting my first pattern

Ok so this pattern is not the very first thing I've drafted but it involves working with a sloper and a pencil skirt and combining the two to make a sleeveless fitted dress. The reason I decided to draft my own pattern is my frustration with those of the big four pattern companies. I also thought this shape wouldn't be too hard to draft. And luckily, it wasn't!

Here it is--


The whole inspiration to this dress was the desire to draft a perfectly fitting princess seam, which I had been reminded about by LiEr's tutorial/ sales pitch for princess seams. The only tricky part was drafting the princess seam correctly. I didn't know exactly where it should fall on the armhole so I did it by eye, referring to some coats in my wardrobe as a guide. On my sloper the armhole was slightly gapey; I thought it may have been because it wasn't staystitched but now I know it wasn't because of this. The excess made a natural fold pretty near the crook of my arm so I just took out about an extra 1cm from the rotated dart.

Overall I'm very pleased. The hours spent fitting a toile of another pattern were cut out because I started from a well fitted sloper. I had started out trying to adapt New Look 6049, which I blogged about a while ago, but the fit was off. So instead I used the sloper I had made last summer using gedwoods tutorial, the pencil skirt from Mademoiselle Chaos's tutorial and New Look 6049 to guide the shape of the neckline and the width of the shoulders.


I changed the positions of the waist darts on the front of my bodice to match them with the dart placement on the skirt to create a continuous line. I did the reverse on the back, changing the darts placement of the skirt to match the dart placement on the bodice.

I also experimented with a strip of interfacing in the waistline (about 2" wide) and the slit of the skirt. In the photos you can see how flat and crisp the waist of the skirt looks.

The dress is half lined, i.e. only the bodice, to reduce bulk and keep the dress slim. The lining is a quilting cotton from my stash and the whole dress was made with only 1m of fabric!


There is a final little secret to this dress. I am going to make a detachable peplum. Peplums, being all the rage, will look tired and outmoded by next year. I thought why ruin a great dress by sewing the peplum in and then never wearing it in two year's time?! By making it detachable the dress can be transformed from work to play, or serious to fun, with an easy addition. 


I haven't absolutely decided how I will  fasten the peplum. I think I'll use hooks and eyes on the waistband and maybe poppers on the peplum itself.


Lesson learnt: the time spent making a sloper will save hours of time later! Secondly, don't let pattern drafting intimidate you. Choose simple and classic shapes to start and gain confidence with these. I think next I should draft that item of clothing that scares even the most confident sewers: trousers.


Alix xxx 

Saturday 31 March 2012

Make your own knitting bag: part II

Here's the promised part two on how to make your own knitting bag. I've never made a bag like this before so all my instructions are from what I worked out by looking at other bags. So you may have a different (and likely more logical and simple) way of doing things so ignore me on those bits. And do post your method - I'd love to hear!

First, make your bias binding for your piping. Skip this section if you know how to do this. I have a foolproof method for finding the bias using a simple piece of kit. Some people use bias binding makers; I have no idea how to use one of these. Instead, get hold of a set square or 45° (or even a protractor) triangle ruler. If you don't have one of these I'd recommend getting hold of one they're also useful for making 90° angles, so cutting straight across the weft threads, say if it was cut wonky off the bolt at the fabric shop. I bought a set with a large ruler, large 45° and 60° triangle rulers and a large protractor for under £5 and it was money well spent.)Simply line it up your triangle with the warp threads, you can use the selvedge if you like, and then rule along the diagonal edge. Then I use an ordinary 30cm ruler as it's about the right width for bias binding to make further lines--


Sew these strips together, pinning them at 90° angles--


Press the seams open. Lay your piping down the middle of the wrong side and pin the fabric together perpendicular to the cord. With a piping foot, sew close to your piping, but leaving a little breathing space - and don't sew into the piping! Here are the diagrams for reference again--


Cut medium to heavy weight interfacing (depending on the fabric you are using) for pieces except piece 5. Using a steam iron press onto wrong side of fabric.

Mark the centre point of the length and height of piece 1. Mark the centre point of the length of pieces 3 and 4.


Take two small square scraps of your fabric and press one edge for a quarter inch seam allowance. Pin the folded edge over the ends of your zip so that they will fall about 1cm within the finished length of your bag. (The photo is a close up after the next step but you get the idea.) So for my bag I had 38cm of exposed zip for a finished length of 40cm. Sew these onto the zip by sewing perpendicular and to the zip close to your folded edge. You may have to turn the wheel by hand as even with a long stitch length the needle can hit the teeth.

Centre zip onto piece 2b and pin. Sew using a zip foot; no need to get really close to the teeth. A little strip of exposed zip tape looks quite nice when you use the big chunky zips. Press flat, being careful not to put your iron over the teeth - they'll melt so watch out. Now line up the raw edges of piece 2a with 2b and pin onto zip and sew in the same way. Together this piece is now piece 2.

This is how things look so far--


Mark the centre points of the height and length of piece 2.

Now take your two 2b lining pieces. Turn the above to the wrong side. Pin one of the lining pieces to seam on what was piece 2. Now sew about 3mm outside of where you sewed the zip onto the outside pieces.


Now do the same but pin and sew the other pocket piece onto the other side of the zip. Press. Then using a 1cm seam allowance sew the two pocket pieces together, going up as far as you can toward the zip.


Now attach the piping to pieces 1 and two with your zip/ piping foot. Clip the piping at 1cm intervals round the corners just before you get to them. Leave about 2" - 3" unsewn at the bottom in the middle. Then cut your piping leaving a 1" overlap. Unpick the stitching on the piping about an inch on each end. Then pull out the exposed ends of your cord and trim a half inch of each so that they lay flat and do not overlap but touch each other. Then fold one exposed end of your piping fabric over and finger press. Lay the other side of your fabric with the raw edge inside this one. Push the cord into the channel and using your thumbnail nicely smooth it in so those open edges don't fan out. Pin perpendicular to the piping Now sew along to close up this final part of the piping.


Now sew the longer zip onto pieces 3 and press.


Attach piece 4 onto the open end side of the zippered pieces 3 (the one you see in the picture). Press seam towards piece 4. Topstitch. Lining up the centre of the long side of piece 1 and the centre point of zippered piece 3 just check that the seam is in line with your centre point and that the on your raw edges of the zippered and bottom piece extend 1.5cm respectively from the centre point of the height of your bag. If not work out how much you need to add or subtract from your seam allowance Repeat sewing and topstitching for the other side.

Starting at the centre point of the shorter side of piece 2, wrong sides together, start sewing one side of piece 3 on. You will be catching the pocket lining as well so make sure this stays flat and smooth. You need to decide which direction you want the zip to open in, i.e. left to right or right to left. Clip seam allowance of pieces 3 and 4 as you  get to the corners to make sewing easier. Also try to stay as close as possible to the piping without sewing through it. On the corners you will need to keep the needle down, lift the foot and rotate.

Then do the same for piece 1 and the other side of your zippered pieces 3 and piece 4. Trim down the seam allowances.

Now for the handles. With wrong sides together sew one piece of interfaced fabric and one piece of contrast fabric of pieces 6 together using a 1/4" seam allowance. Sew both long sides and one short side together. Clip corners diagonally and turn through. Press. Repeat. On the open ends fold the raw edges inside about 1/4".

Determine how far apart you want the handles to be. I made mine 11cm apart to the outside edges. Centre over your pieces 1 and 2 with the contrast side underneath. I doubled the ends over about 2cm for extra stability. Place the fold 2.5cm from the piping and push the seam allowances in the bag towards the zip. Sew a rectangle and cross through the diagonals being careful not to catch the piping.


Next time I'll finish by showing how to make the lining...


Alix xxx